YINTAI: a game mech modelled entirely in code
YINTAI is the hero mech of Tiangong Warframe. An AI agent wrote it as code on the ForgeAX engine, one armour panel at a time, with a human art-directing every round. This is how it was built, what the numbers are, and where they come from.
You can also rotate the finished model in your browser — wireframe, chord-error heat map, part-by-part build and the mech ↔ fighter transform, on the same mesh the game ships.
One piece of code, two levels of precision
The whole mech is generated by 8 source files, about 4,100 lines of TypeScript. Thirty joints are fixed first; the armour is then assembled piece by piece from the engine's high-degree NURBS surfaces. The same code sampled densely is the high-poly model. Sampled at game density it is the low-poly model. Rivets, bolts and other small parts are baked into one 512² normal / AO atlas. No external model or texture file was imported, and nothing was sculpted or decimated by hand.
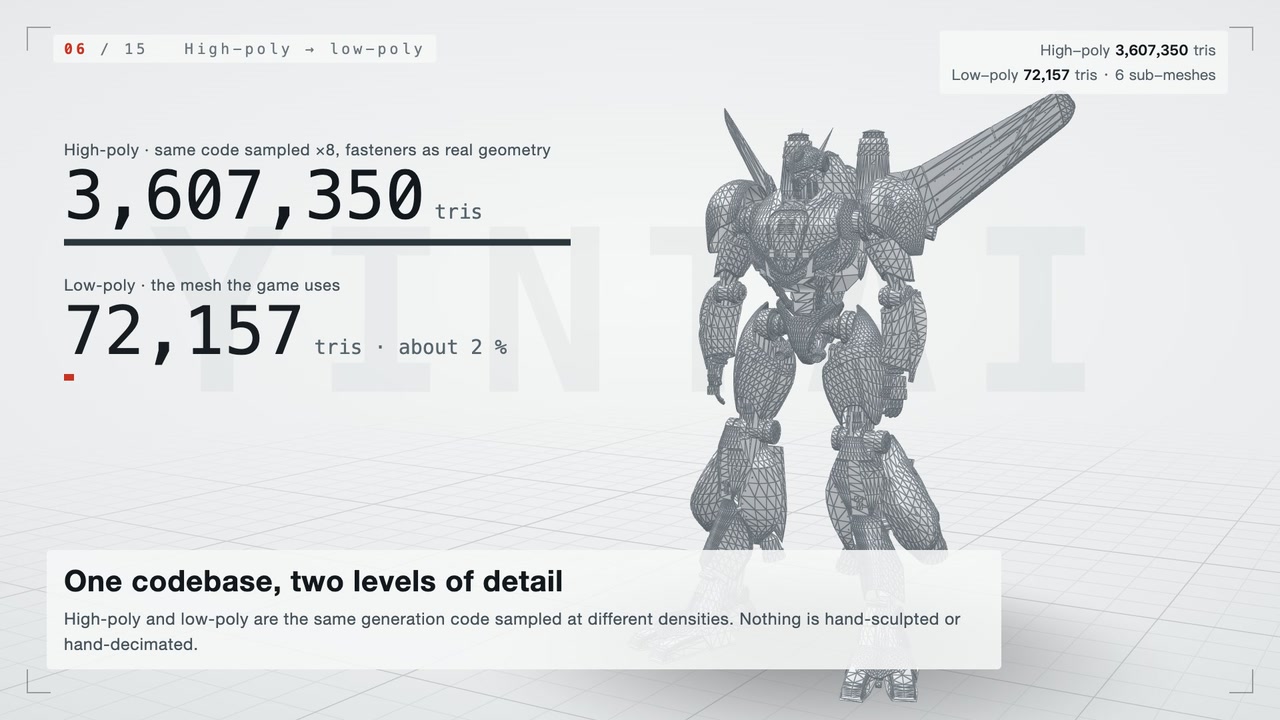
- 3,607,350 high-poly triangles (offline, never shipped)
- 72,157 low-poly triangles, about 2 % of the high-poly model
- 6 sub-meshes = 6 draw calls
- 512² one baked atlas: normal + AO
- 30 joints, shared by mech and fighter
- 41 transform samples, mech ⇄ fighter
- 9.83 m overall height
- 0 external model / texture files
The game has three body builds, and each gets its own low-poly mesh: 72,157 / 72,424 / 72,349 triangles. The numbers below are for the first one.
Where the concept does not add up, fix it before building
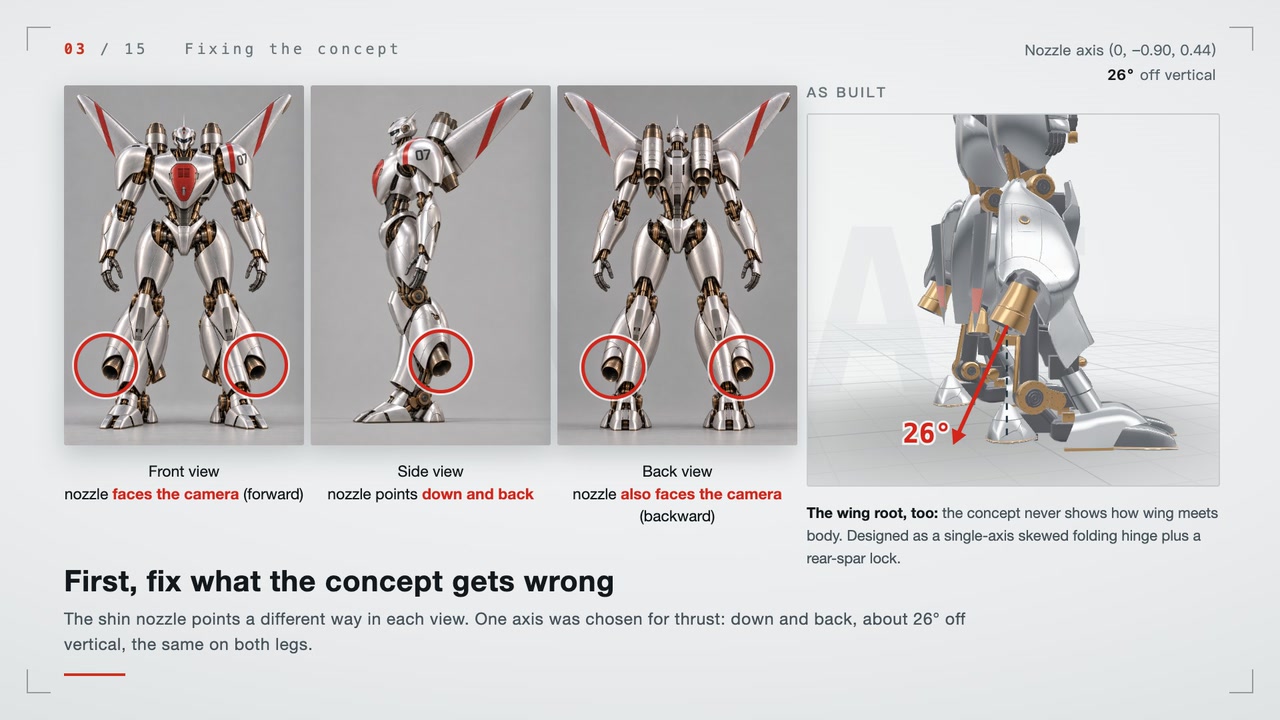
The concept is AI-generated: one hero image plus three orthographic views, each generated separately. It gives masses, creases and character — not a blueprint. Where the same part disagrees across the three views, tracing any one of them is wrong; the part has to be settled by what it is for.
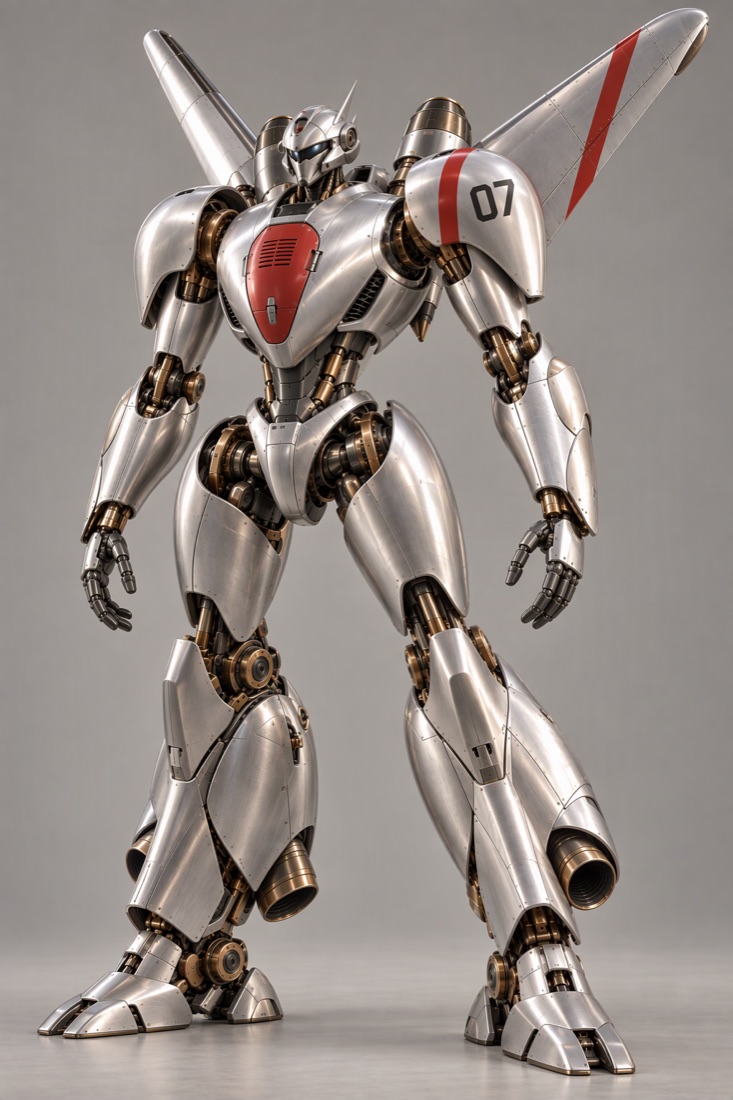
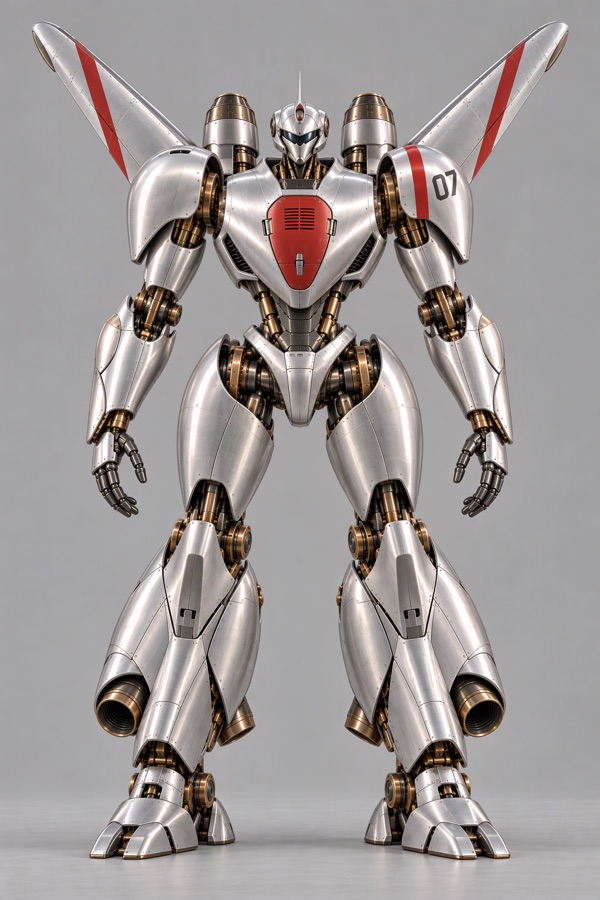
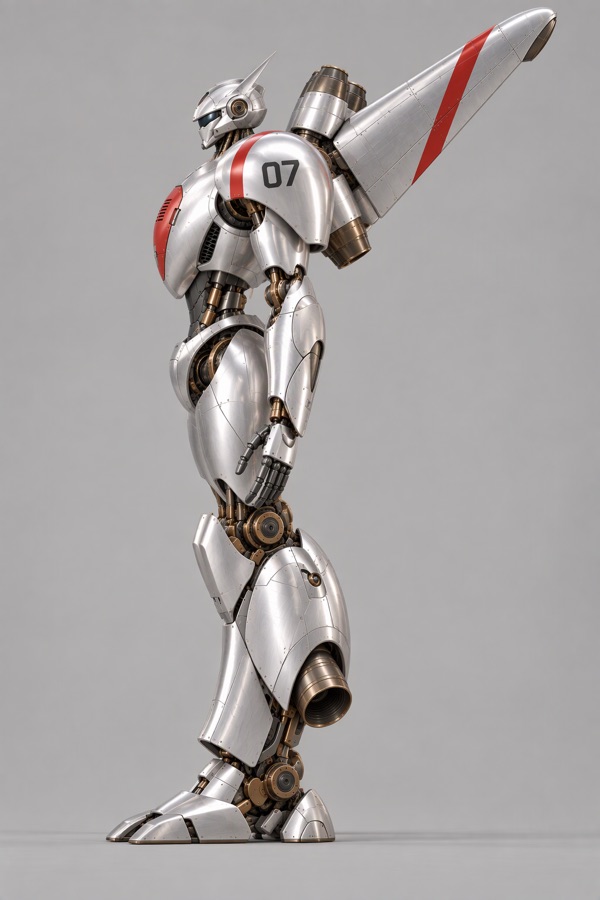
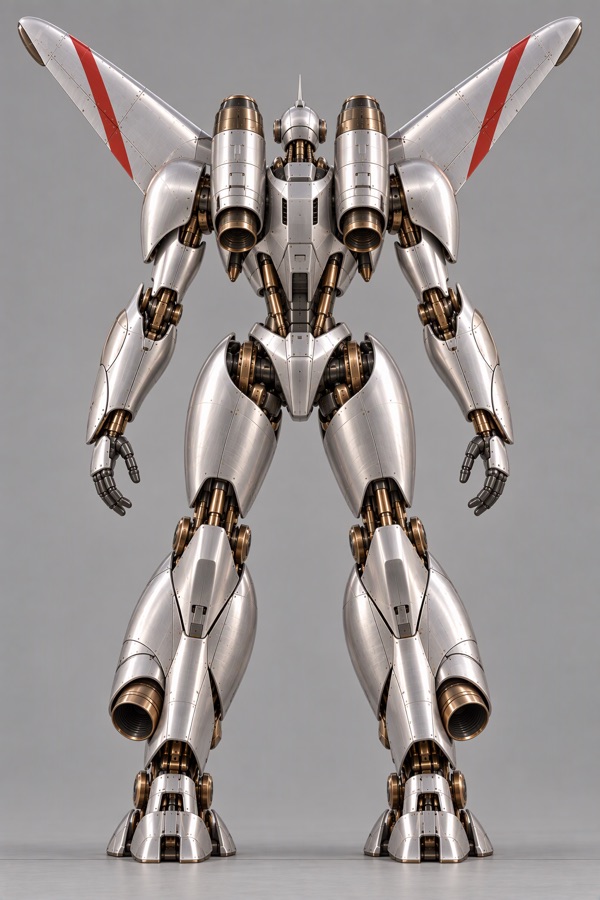
| Problem in the concept | How it was settled |
|---|---|
| The shin nozzle is drawn differently in each view. In the front view it faces the camera, in the back view it also faces the camera, and in the side view it points down and back. | The nozzle is there for thrust, so it can only have one axis: down and back, the same on both legs, 26.3° off vertical. |
| The concept never resolves how wing meets body. No mechanical structure is visible at the joint. | Designed as a single-axis skewed folding hinge plus a rear-spar lock; the wing root is left full, not cut away. |
| The three views do not line up with each other. They were generated separately, so the same part differs in position and size between them. | For each part, the view that explains its structure best is the reference; the other two are only used to check the silhouette. |
It also went the other way. The curve on the inner thigh and the folded plate edges were first read as decoration and built wrong. The concept was right: they are the flanges of formed aluminium / titanium sheet. So “fixing the concept” only touches what cannot work functionally; anything not yet understood is assumed to have a reason. The nozzle angle is not final either — the side view shows about 50°, and the three builds currently use 18–26°.
From concept to game, step by step
1 · Fix the 30 joints first
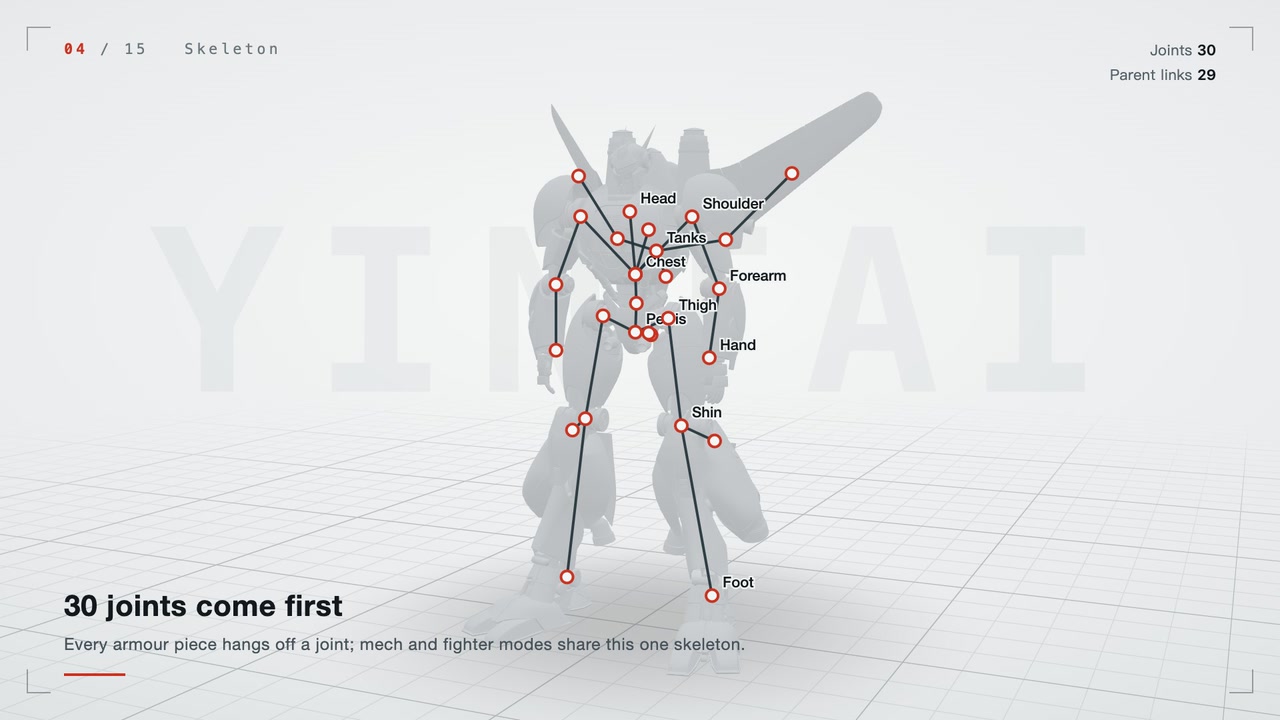
Pelvis, spine, chest, head, limbs, pack, two-stage wings, tail fins, canopy — 29 parent links. Every part hangs off one joint, and the transformation only moves joints.
2 · Surfaces, one part at a time
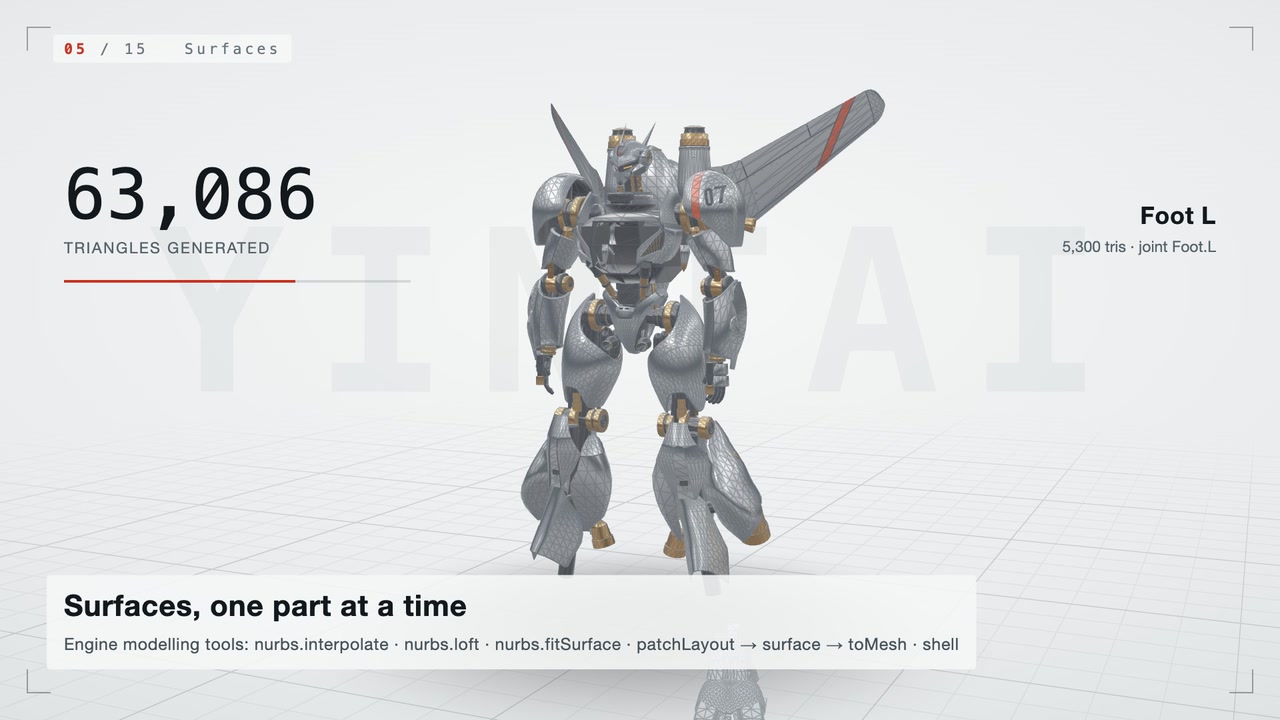
Each armour plate is a degree-5 or degree-6 NURBS surface: lofted through section curves, fitted to a measured grid of points, or assembled from several patches with a crisp crease between them. Like a car body — broad surfaces and sharp character lines, not a blob.
3 · One codebase, two levels of detail
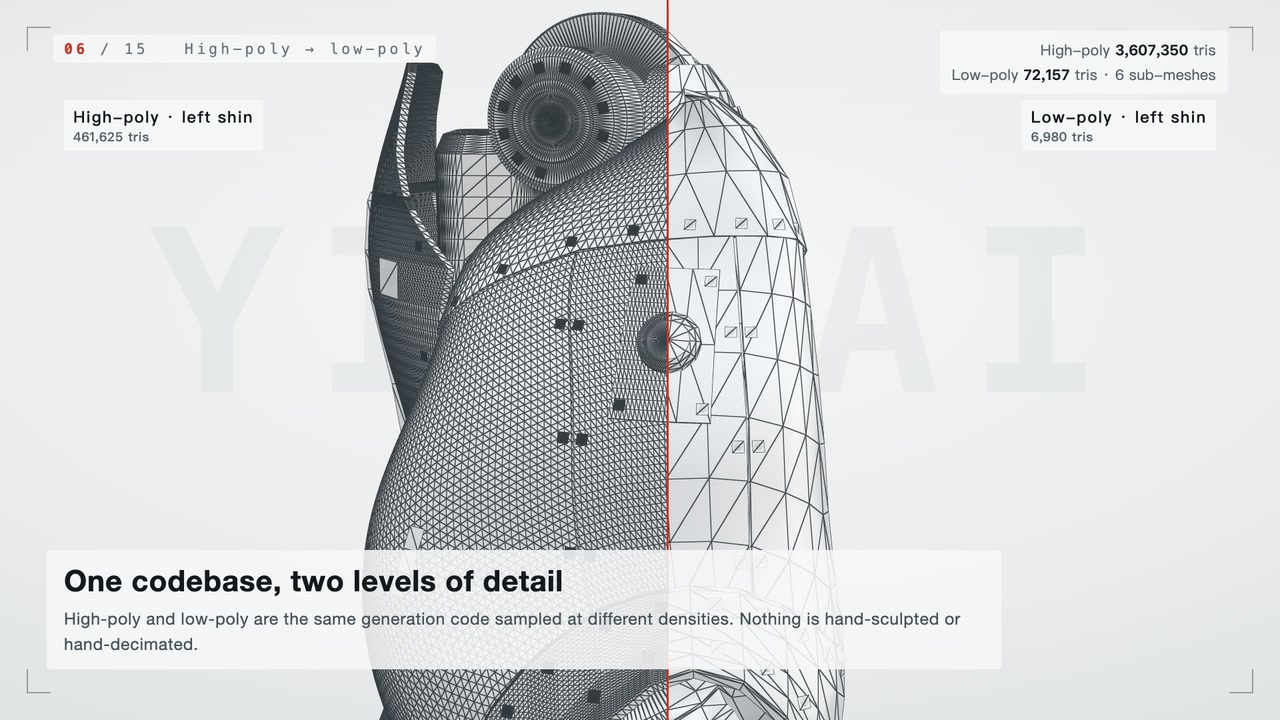
The left shin: high-poly on the left (461,625 triangles), low-poly on the right (6,980), the same surface. There is no manual retopology. Patch assemblies give the engine a chord tolerance, trimmed panels are sampled on a grid, and lathed parts get a segment count.
4 · Measure how far the low-poly sits from the surface
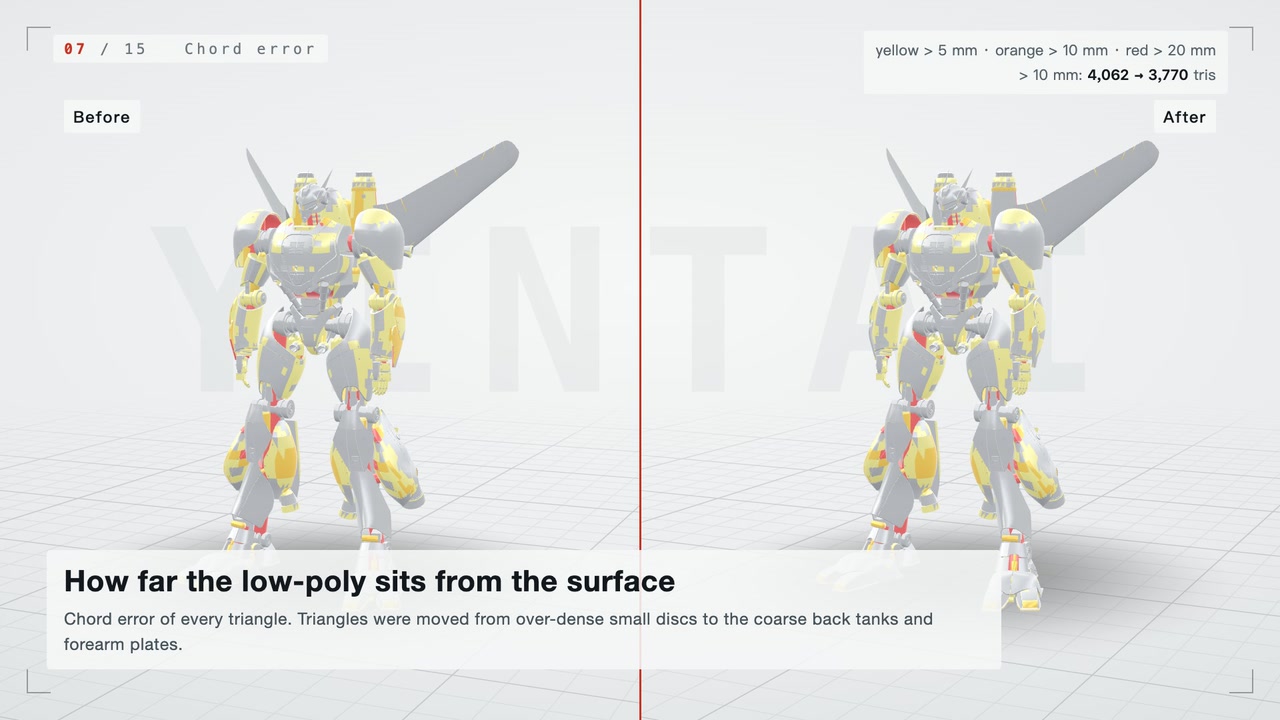
The chord error of every triangle, drawn as a heat map. One late pass moved triangles from over-dense small copper discs to the coarse back tanks and forearm plates: back tank median 9.5 → 2.6 mm, with no increase in the total.
5 · Big forms are not baked — only small parts
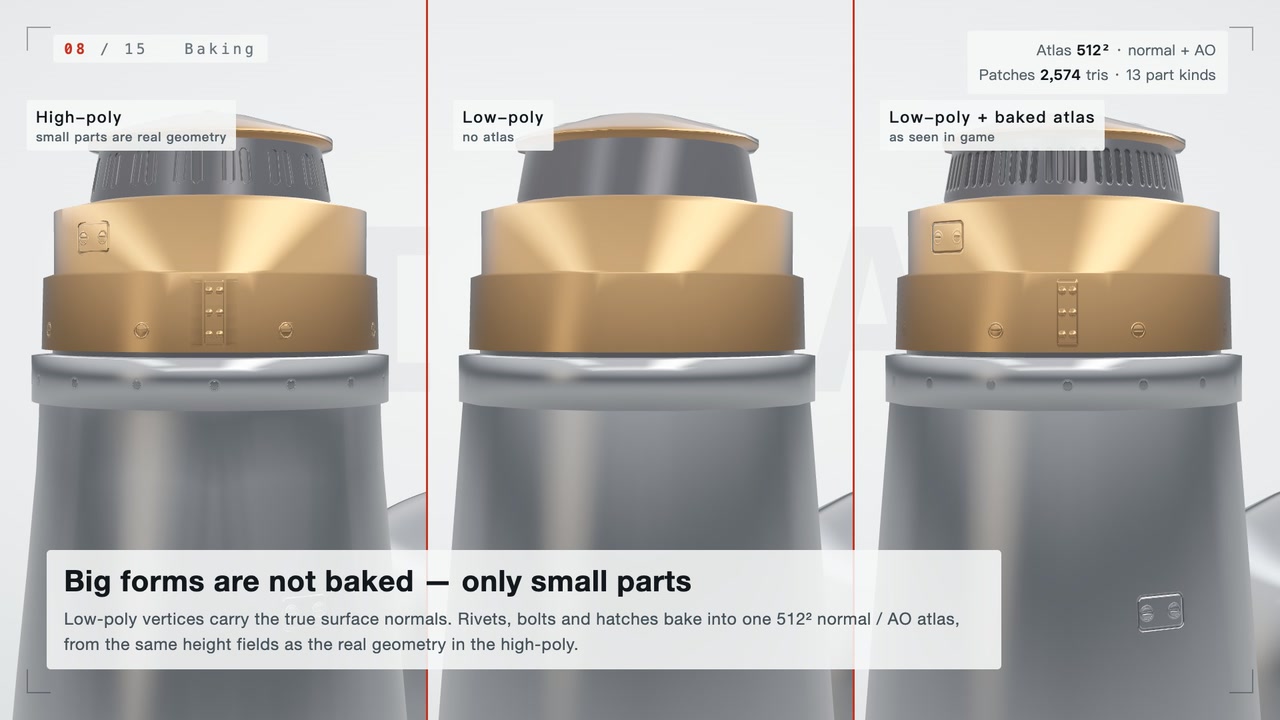
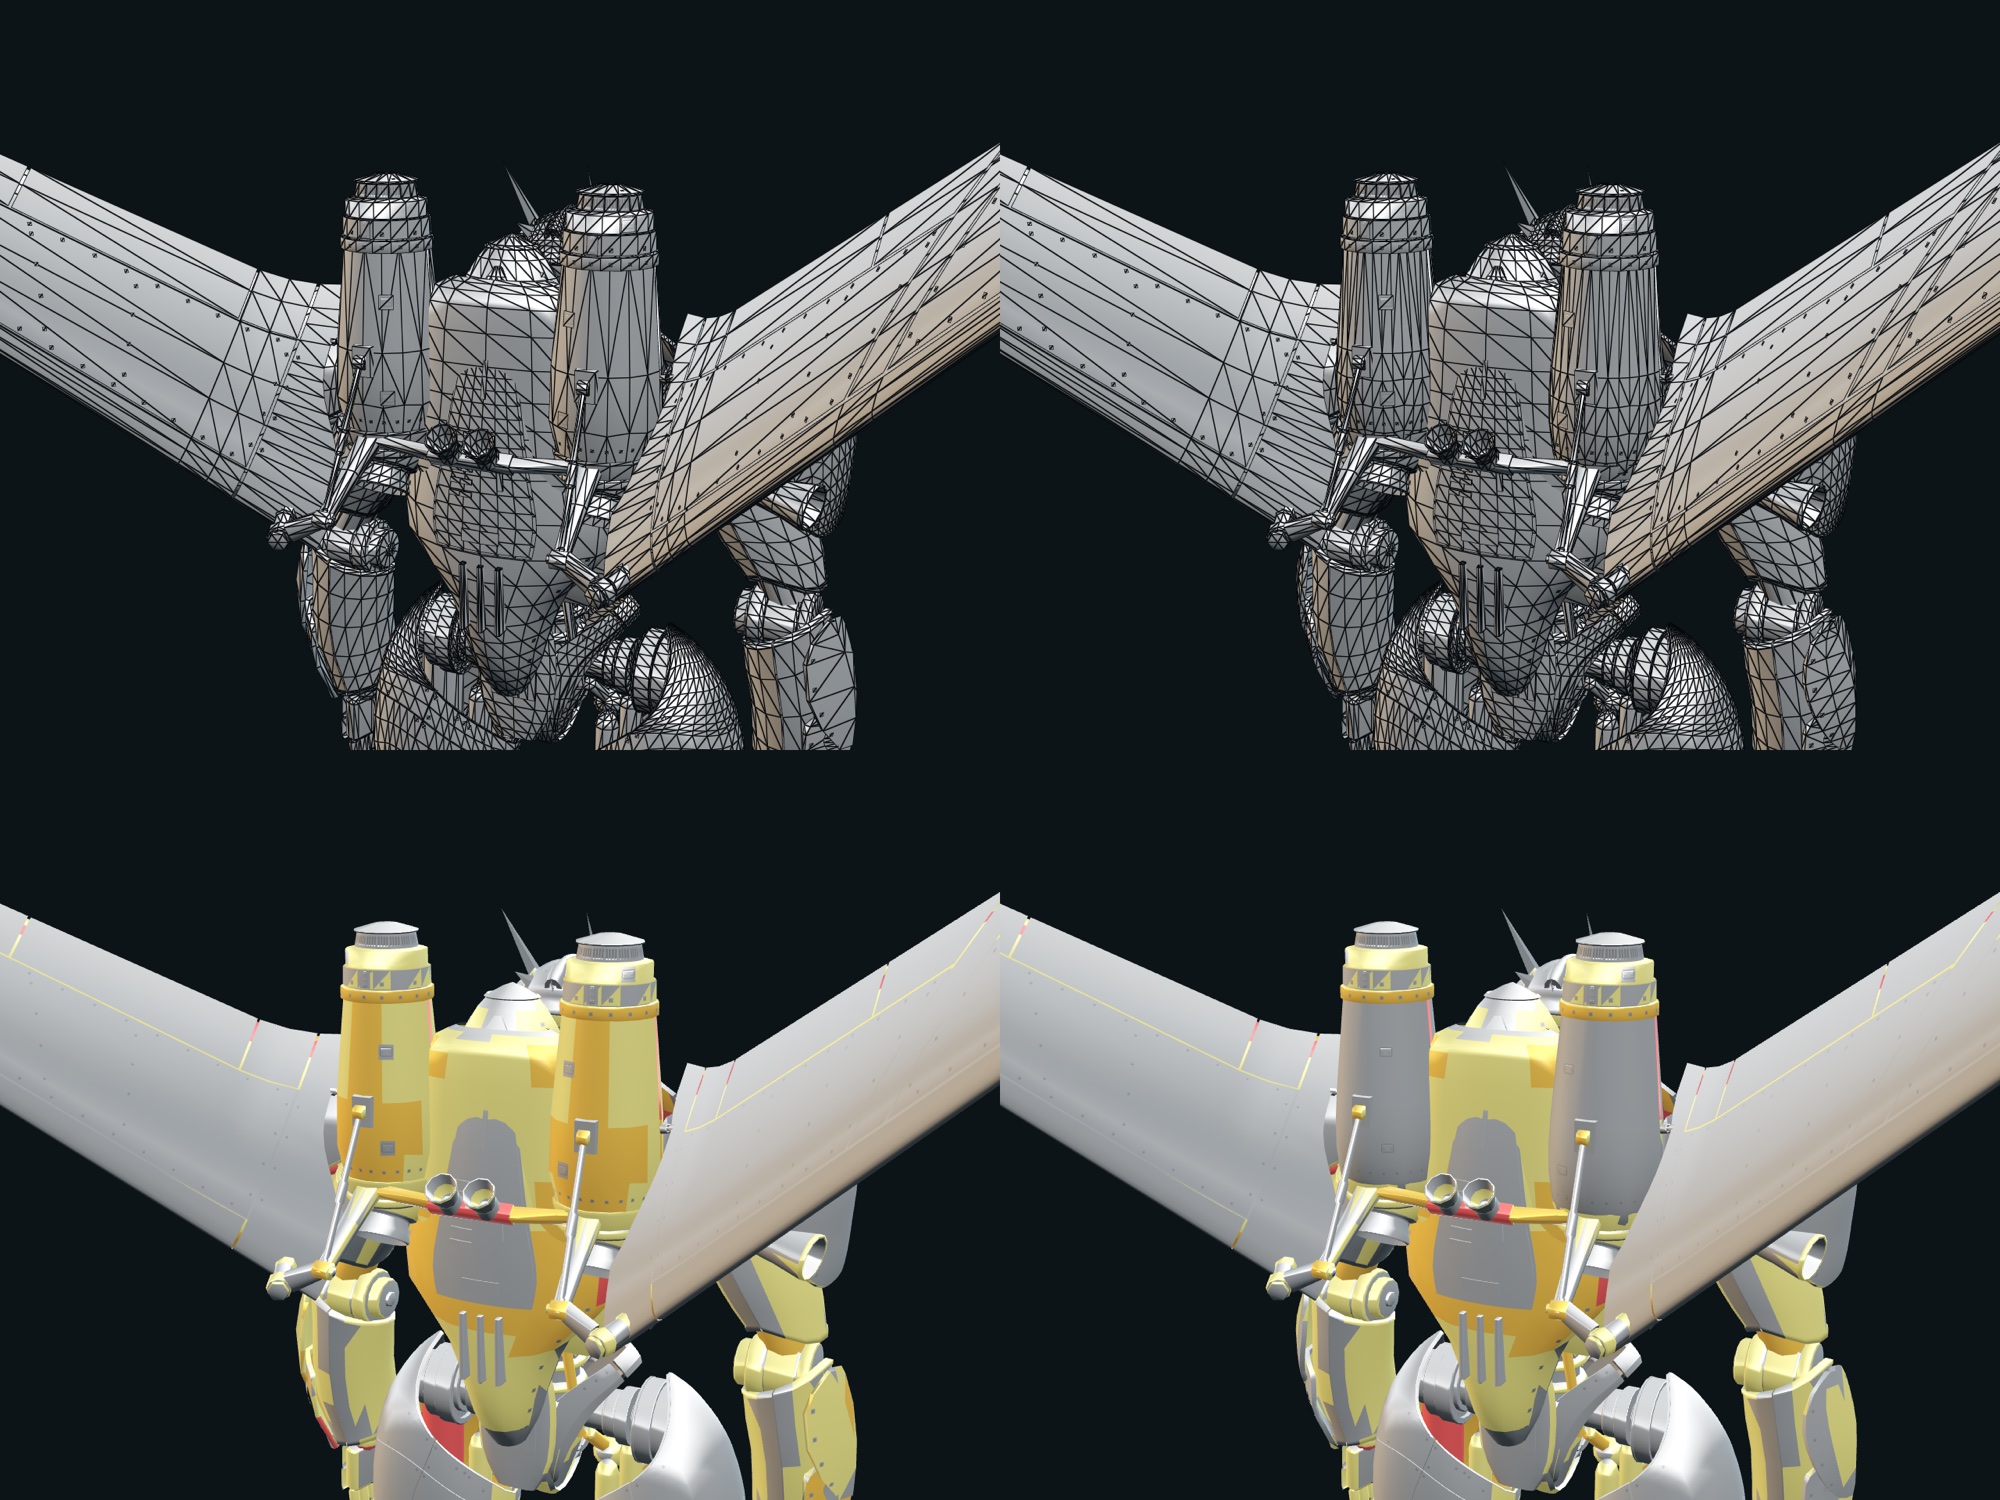
Three views of the same back tank: high-poly (rivets are real geometry), low-poly without the atlas, low-poly with the baked atlas (as seen in game). Rivets, bolts, hatches — 13 kinds of small parts — bake into one 512² normal / AO atlas.
6 · Four material slots
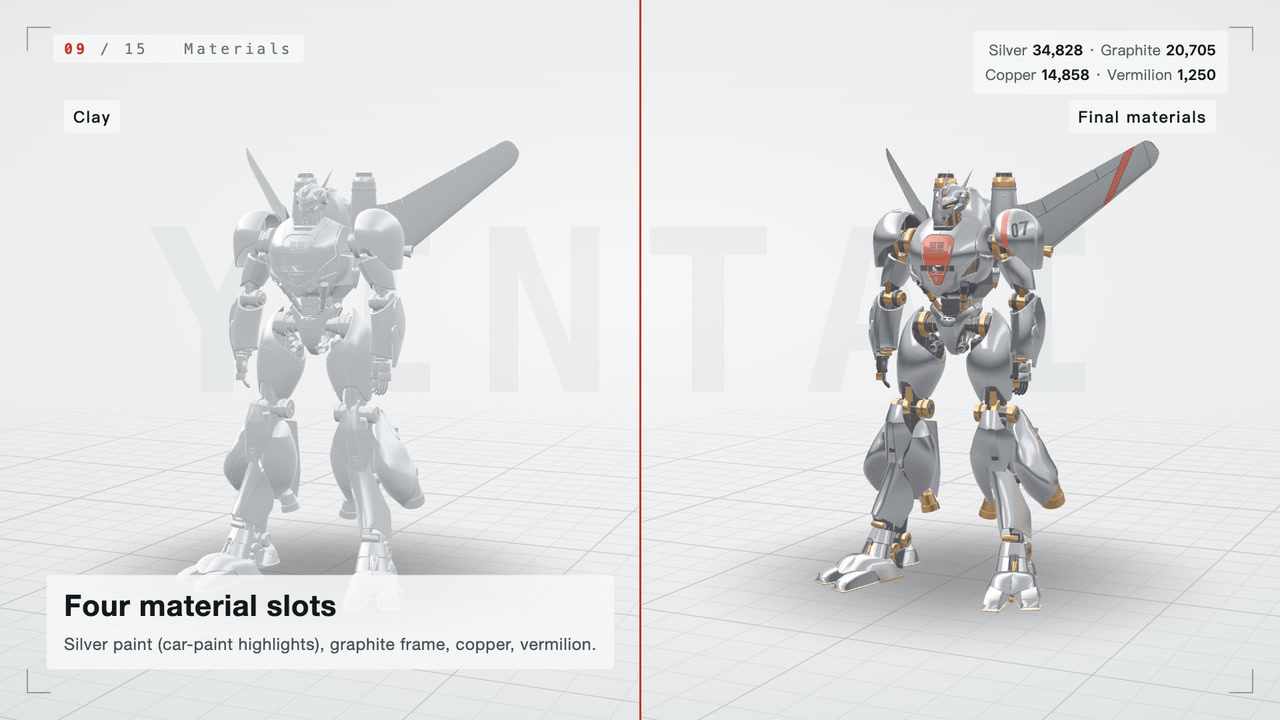
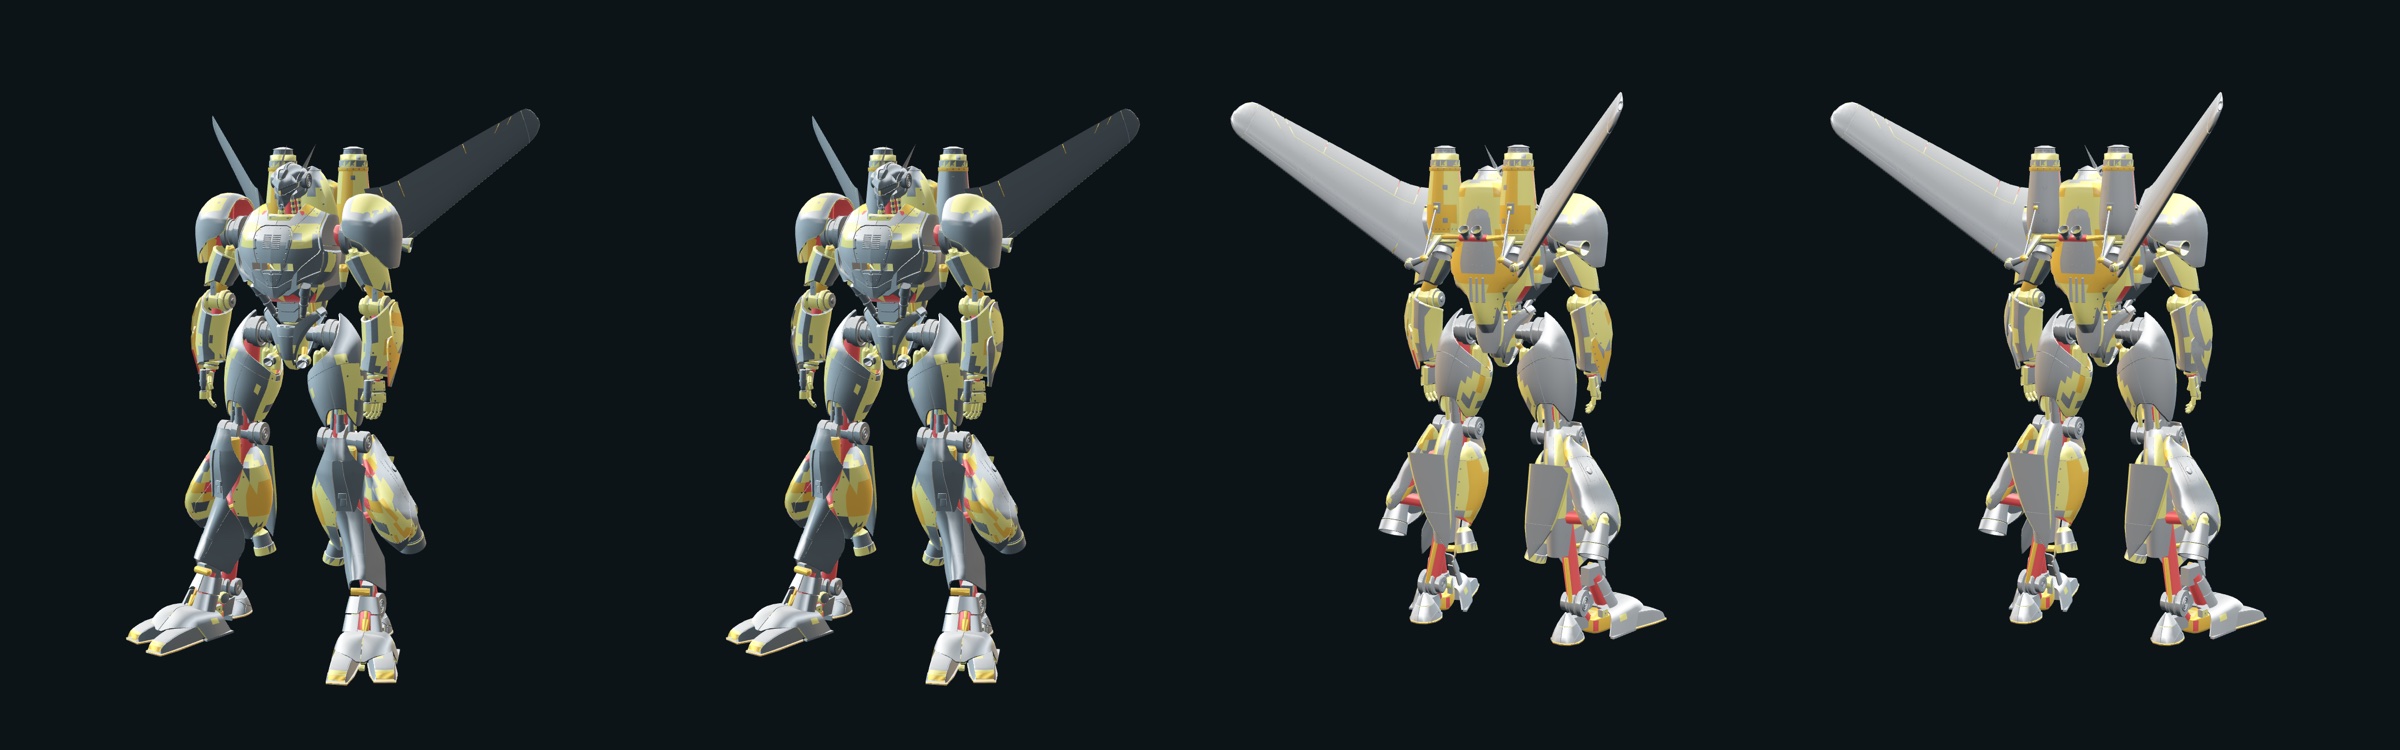
Silver paint (car-paint highlights, brushing direction following the surface), graphite frame, copper, vermilion. All procedural materials; no texture files.
7 · One mesh, two modes
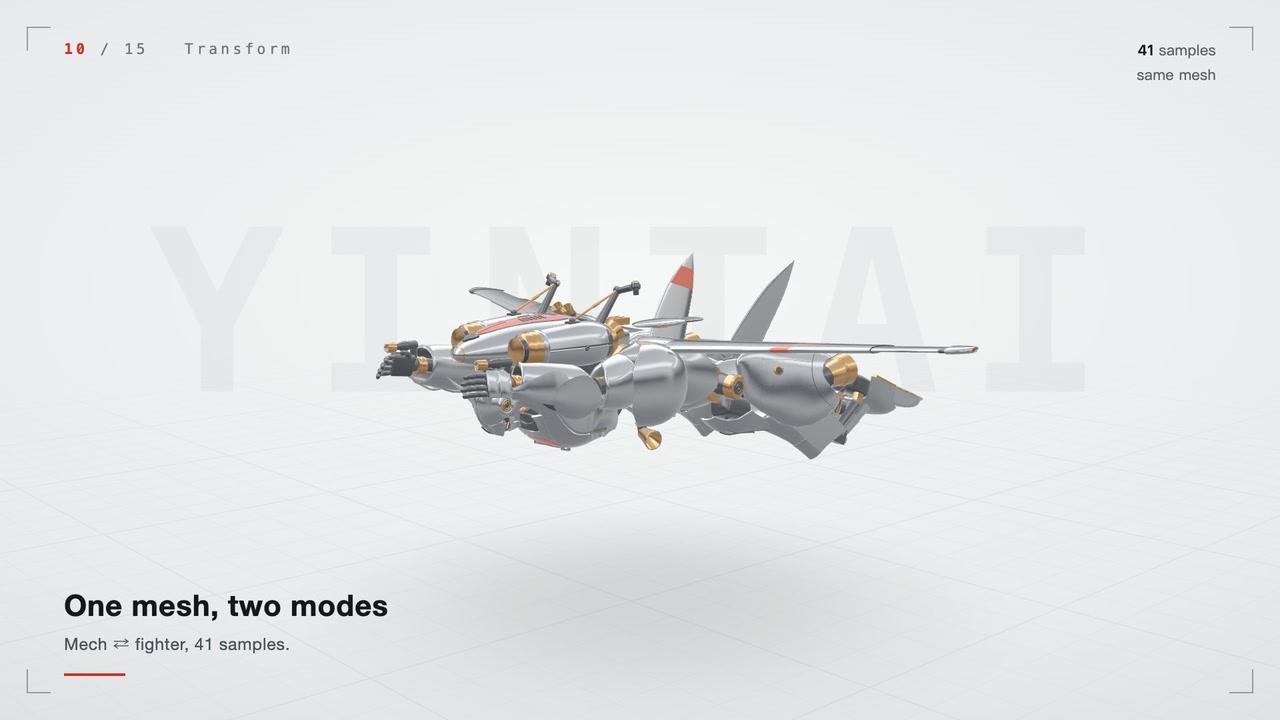
Mech and fighter are the same mesh on the same 30 joints. The transformation is a joint animation exported as 41 samples; the “Mech ↔ fighter” slider on the 3D model page plays it.
8 · Into the game
Weapons must not clip into the body in the idle pose; all three body builds are checked and covered by guard tests. During development every round was checked back in the game, side by side with the concept.
Which modelling tools were used
The entry point is @forgeax/engine/modeling. The upper part of the table ships with the engine; the last three rows are small helpers written on top of it for this mech.
| Tool | What it does | Where it is used |
|---|---|---|
nurbs.interpolate |
Interpolates a degree-5 curve through a list of points | Every section curve of a lofted surface, the helmet meridians, the shoulder sections |
nurbs.loft |
Lofts several section curves into one surface | Helmet, shoulder armour, and four armour pieces shaped by section curves |
nurbs.fitSurface |
Fits a grid of points with a high-degree surface (up to degree 6 × 6) | The most used: 15 places — chest armour, brow, front shin plate, the ovoid outer plates on the legs |
nurbs.match |
Makes two surfaces tangent- or curvature-continuous along a shared edge (G0 / G1 / G2) | The join between the front and side surfaces of the chest armour |
nurbs.surfacePoint / surfaceDerivatives |
Evaluates points and normals on a surface | Vertex normals are the true surface normals, so shading stays smooth even on a coarse mesh |
model().patchLayout() |
Declares “several patches form one part”: each patch is degree 5 × 5, neighbours share a crease, and the crease can be filleted | Back tank barrel, upper and lower forearm plates, the foot plates |
.surface({ chord, angle, sew }) |
Tessellates the surface to a chord tolerance and sews the patches together | Meshing of the patch assemblies; the high-poly model simply tightens chord by 8× |
.lift() + .shell() |
Brings the tessellated surface back into the modelling session and adds inward thickness | Wherever a patch assembly needs sheet thickness |
.uv.project() / .toMesh() |
Projects UVs and outputs a triangle mesh | The last step of every part |
trimSheet / bakeTrimSheet / textureFrom |
Packs the height fields of small parts into one atlas and bakes normal and AO | Rivets, bolts, hatches, grilles, scratches and more — 13 kinds, 2,574 patch triangles |
panel (project helper) |
Cuts a panel out of a surface by parameter range, gives it thickness and folds the edge inward | 23 places: nose, chest armour, shin, keel, tail fins and other skins separated by panel gaps |
tpatch (project helper) |
A trimmed surface patch with an arbitrary outline | 37 places: helmet, brow, shoulder armour, the ovoid leg plates and other plates with notches or slanted edges |
lathe / latheHard (project helper) |
Revolves a profile around an axis (the latter keeps hard edges) | About 100 places: joint discs at knee, hip, shoulder, ankle and elbow, axle caps, nozzles |
The high-poly model is genuinely procedural
The high-poly model is not sculpted and is not a separate file. Give the generation code a precision level and the same code samples at 8× density, then raises the fasteners in the atlas into real geometry from the same height fields. That is the high-poly model. It is only used offline: to count triangles, to shoot comparisons, and to measure how far the low-poly sits from it.
| How the high-poly count adds up | Triangles | Notes |
|---|---|---|
| Surfaces sampled at ×8 | 1,702,266 | Grid counts and segment counts × 8, chord and angle tolerances ÷ 8; no outline point, structure line or panel gap was moved |
| 1,257 fasteners as real geometry | 1,907,598 | 975 rivets, 207 bolts, 32 grilles, 8 hatches and more; on a 1 mm grid, the surface is raised with the same height fields the atlas is baked from |
| Minus the patches they replace | −2,514 | 60 patch triangles remain: 30 scratches / scuffs, 0.05–0.15 mm deep, too shallow to become geometry |
| High-poly total | 3,607,350 |
| Same part | High-poly | Low-poly | Low / high |
|---|---|---|---|
| Left shin | 461,625 | 6,980 | 1.5 % |
| Pack / back tanks | 417,762 | 5,979 | 1.4 % |
| Whole mech | 3,607,350 | 72,157 | 2.0 % |
What is baked and what is not
- The big forms are not baked. The body has no “high-poly projected onto low-poly” normal map. Every low-poly vertex carries the analytic surface normal, so shading stays smooth on coarse triangles and facets only show on the silhouette.
- Small parts are baked. Rivets, bolts, nuts, screws, quick-release latches, nameplates, grilles, hatches, straps, scratches, scuffs, datum marks and scales — 13 kinds, each a procedural height field. The engine's
trimSheet/bakeTrimSheetbakes them into one 512² normal + AO atlas, applied on 2,574 patch triangles. - High-poly fasteners and the atlas share one source. The atlas is baked straight from the height fields, not projected from the high-poly mesh; the real geometry in the high-poly model is raised from the same height fields, so both sides have the same shapes.
Two caveats. First, the high-poly count depends on the level chosen: ×8 and a 1 mm grid were picked for this model, and a different level gives a different number. It is not a “whatever was sculpted” figure. Second, not everything is densified in the high-poly model: wing skins, sleeves, the straps on the head and small hand-pointed parts are the same as in the low-poly, so 3,607,350 is on the conservative side.
Low-poly topology and precision
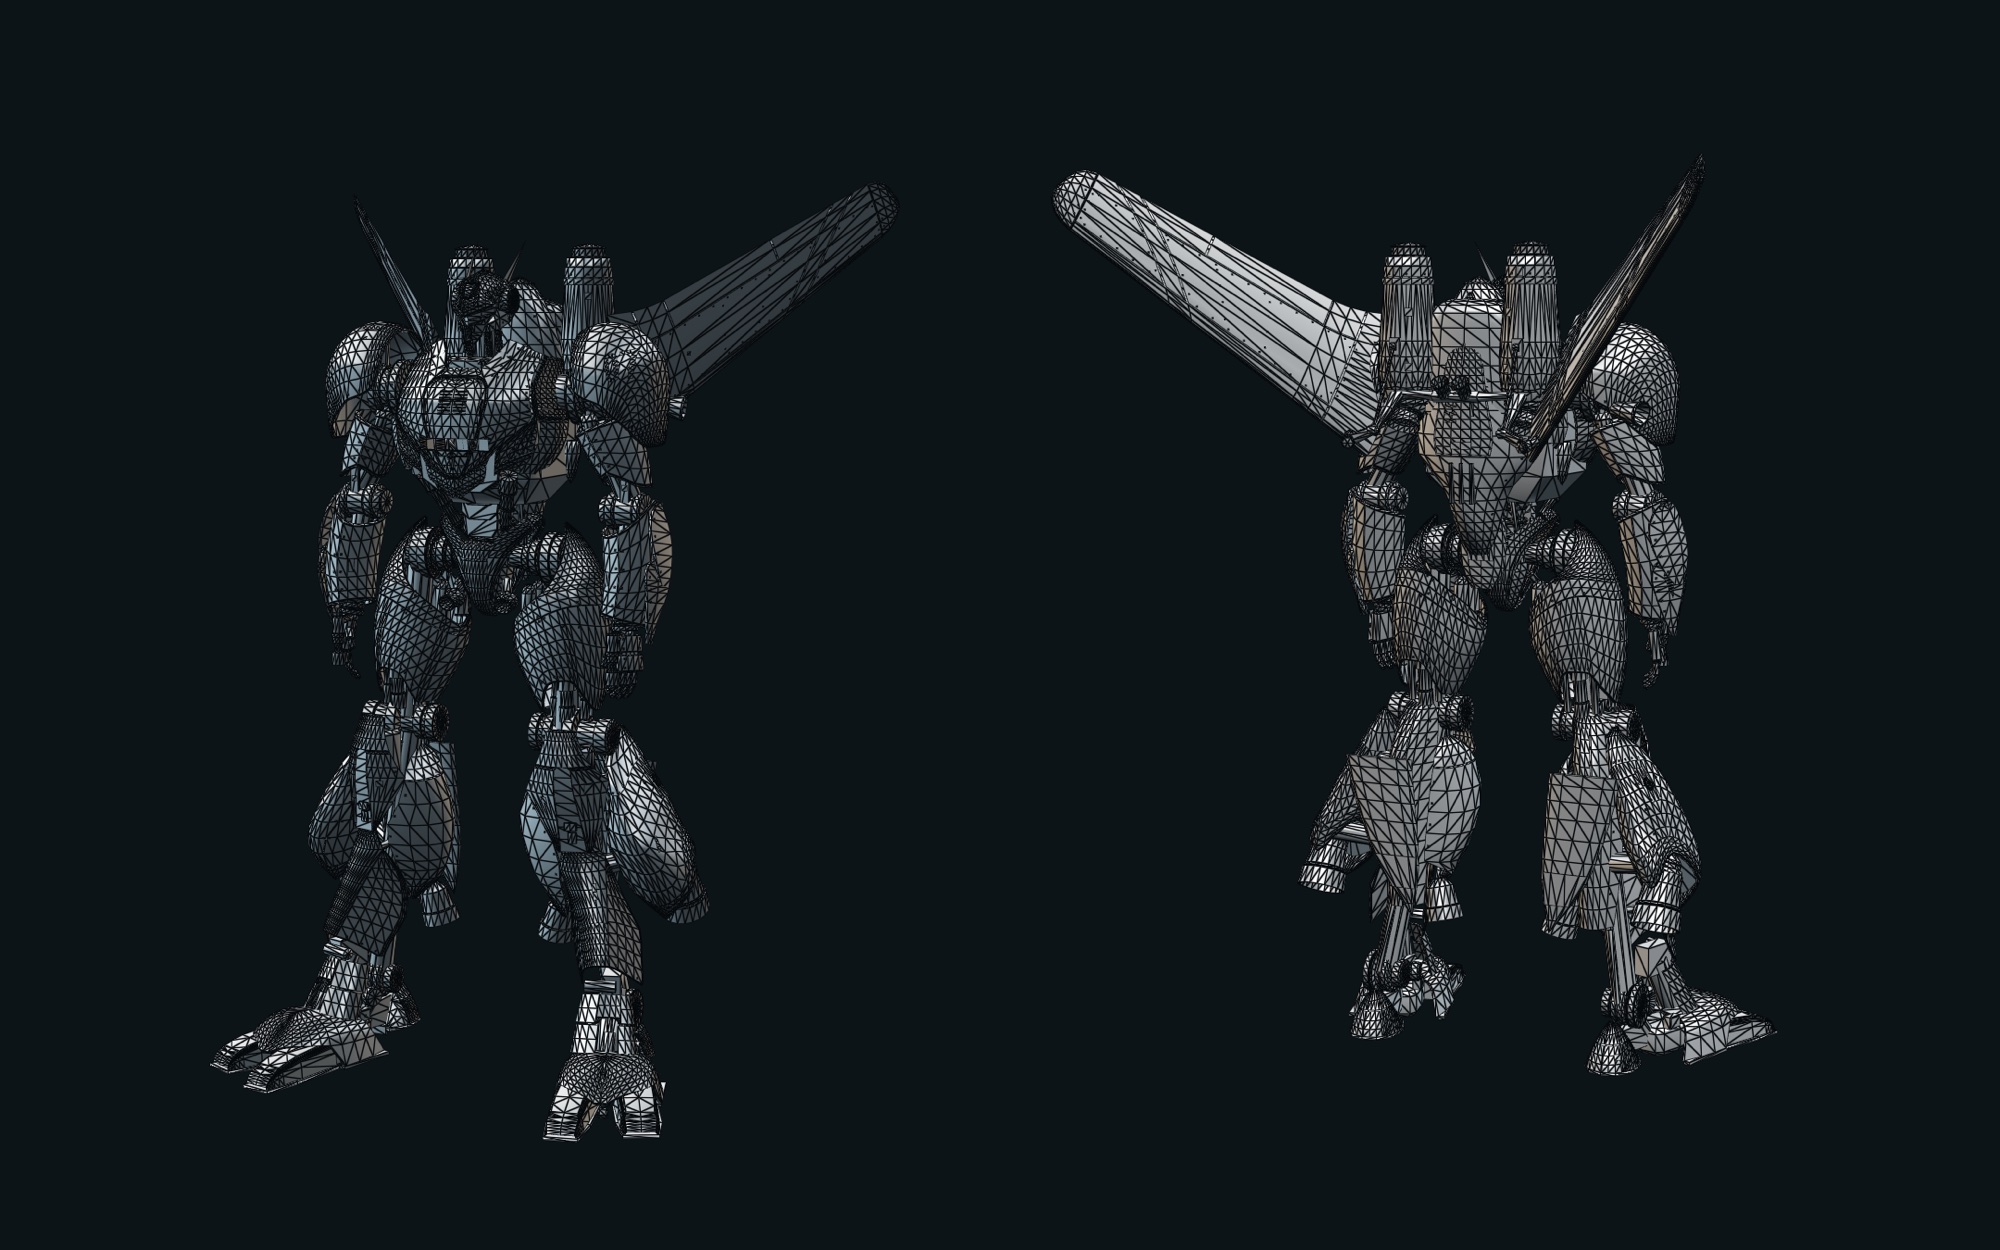
The low-poly mesh is checked three ways: a chord-error heat map (yellow > 5 mm, orange > 10 mm, red > 20 mm), sliver triangles, and triangles that cannot be seen from any of 300 directions.
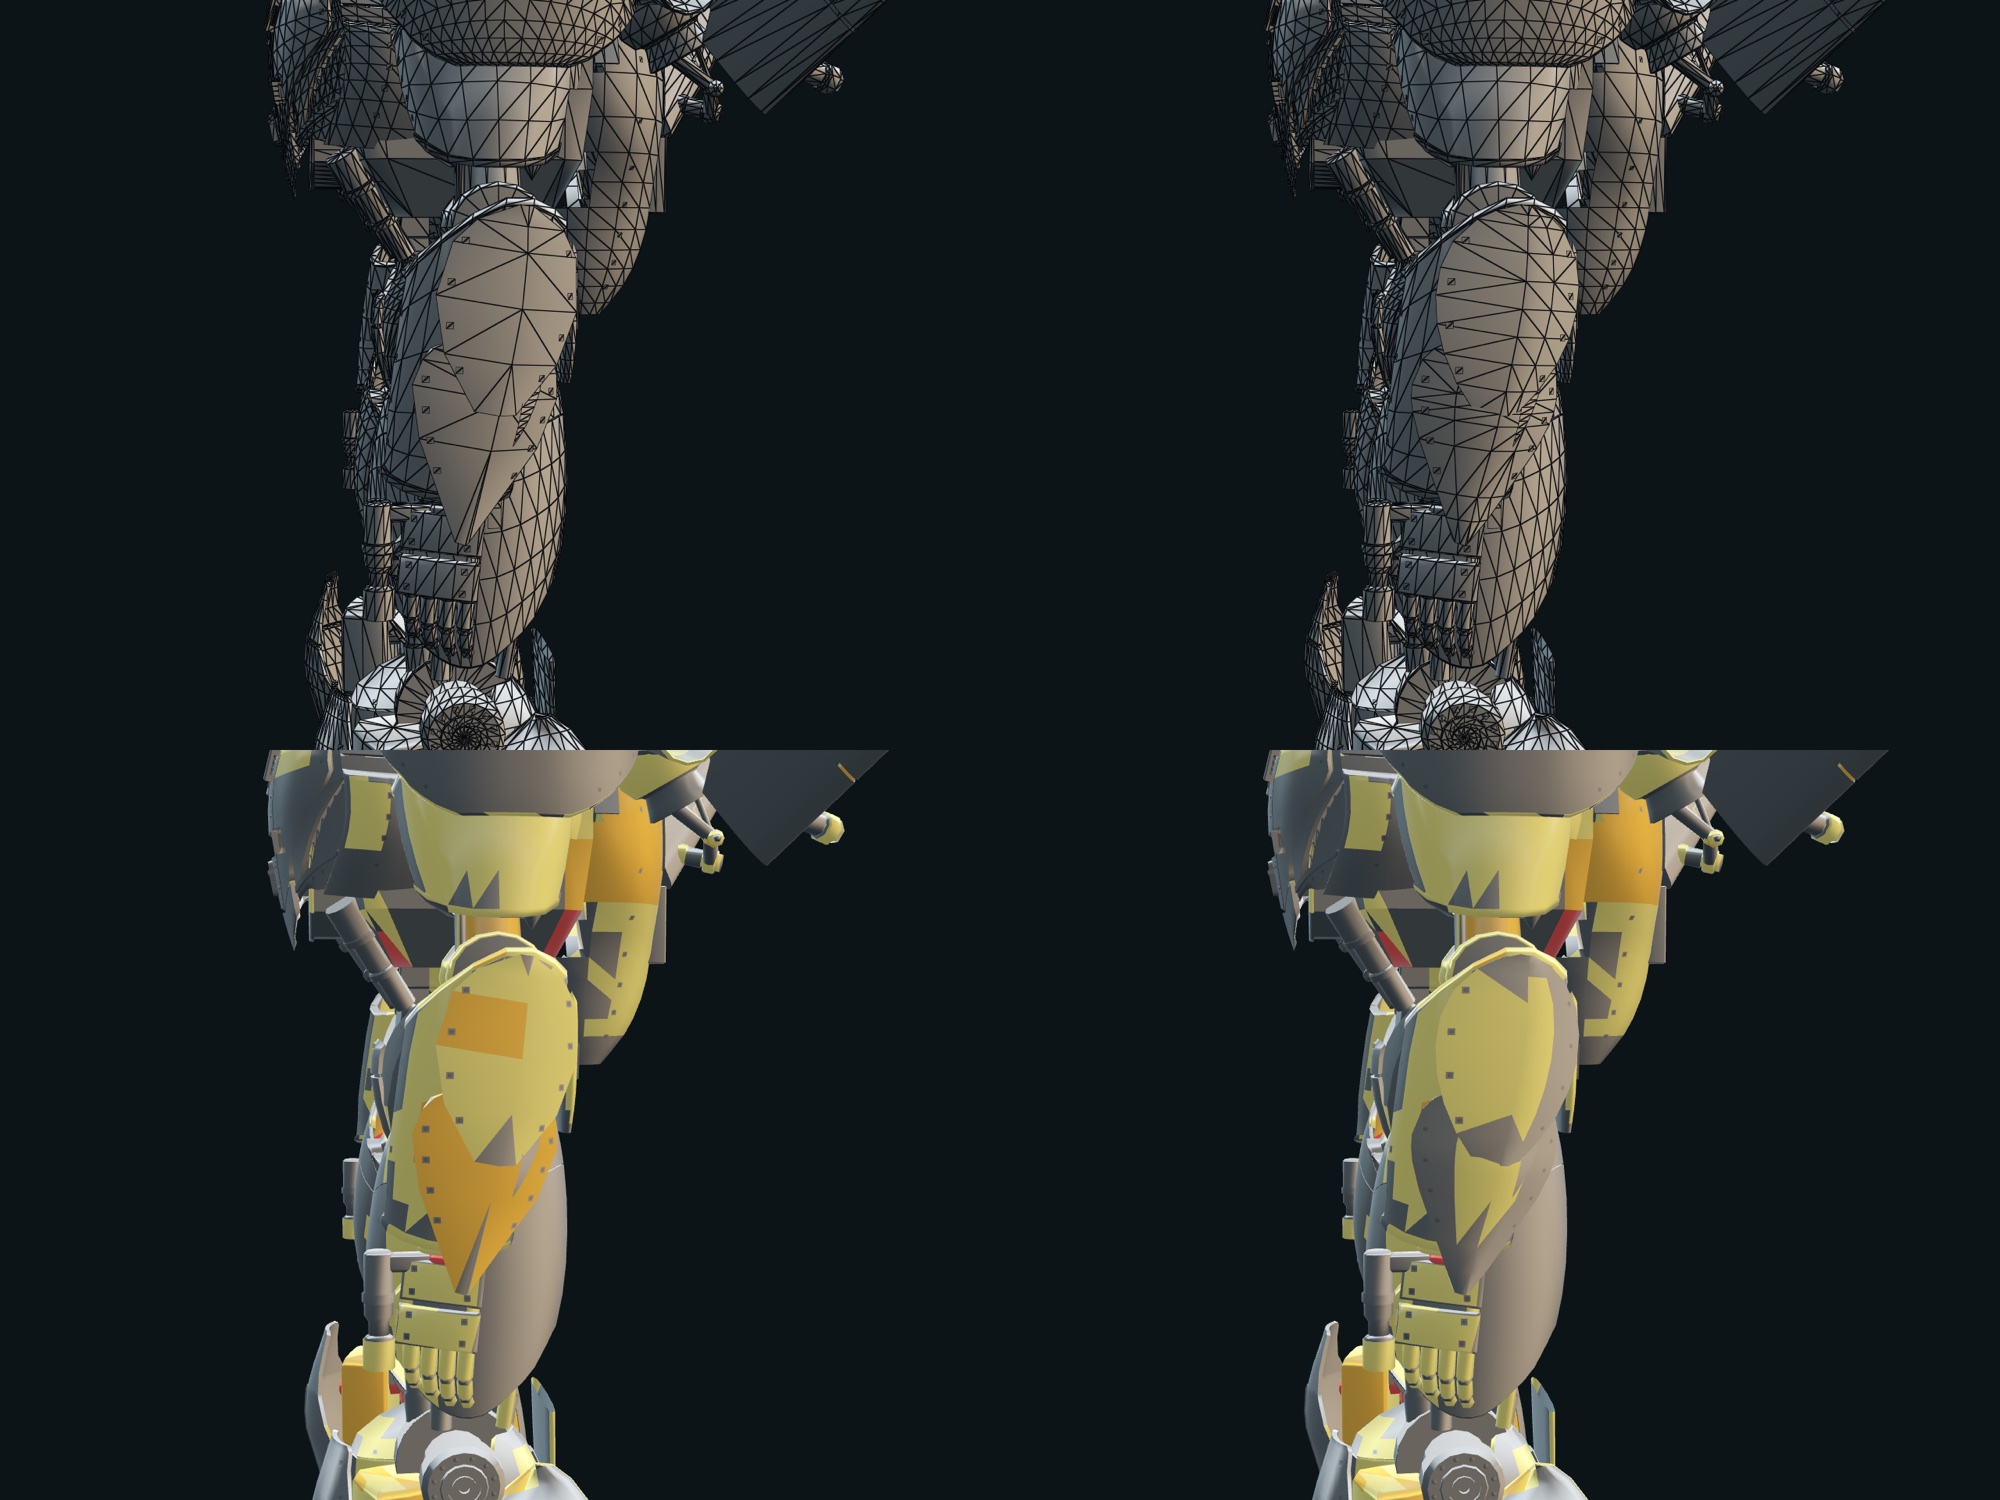
| Topology pass | Before | After |
|---|---|---|
| Body triangles | 72,185 | 72,157 |
| Triangles with chord error > 10 mm | 4,062 | 3,770 |
| Back tank barrel, median chord error | 9.5 mm | 2.6 mm |
| Upper forearm plate, median chord error | 9.8 mm | 3.9 mm |
| Small copper joint discs, sagitta | 1.2–2.6 mm | 2.8–4.0 mm |
In a full-body game shot this pass cannot be told apart; only with the back tank enlarged 3× side by side does the edge of the highlight band look slightly smoother. The gain is in the numbers and the wireframe: the total did not grow, triangles just moved from where they were not needed to where they were.
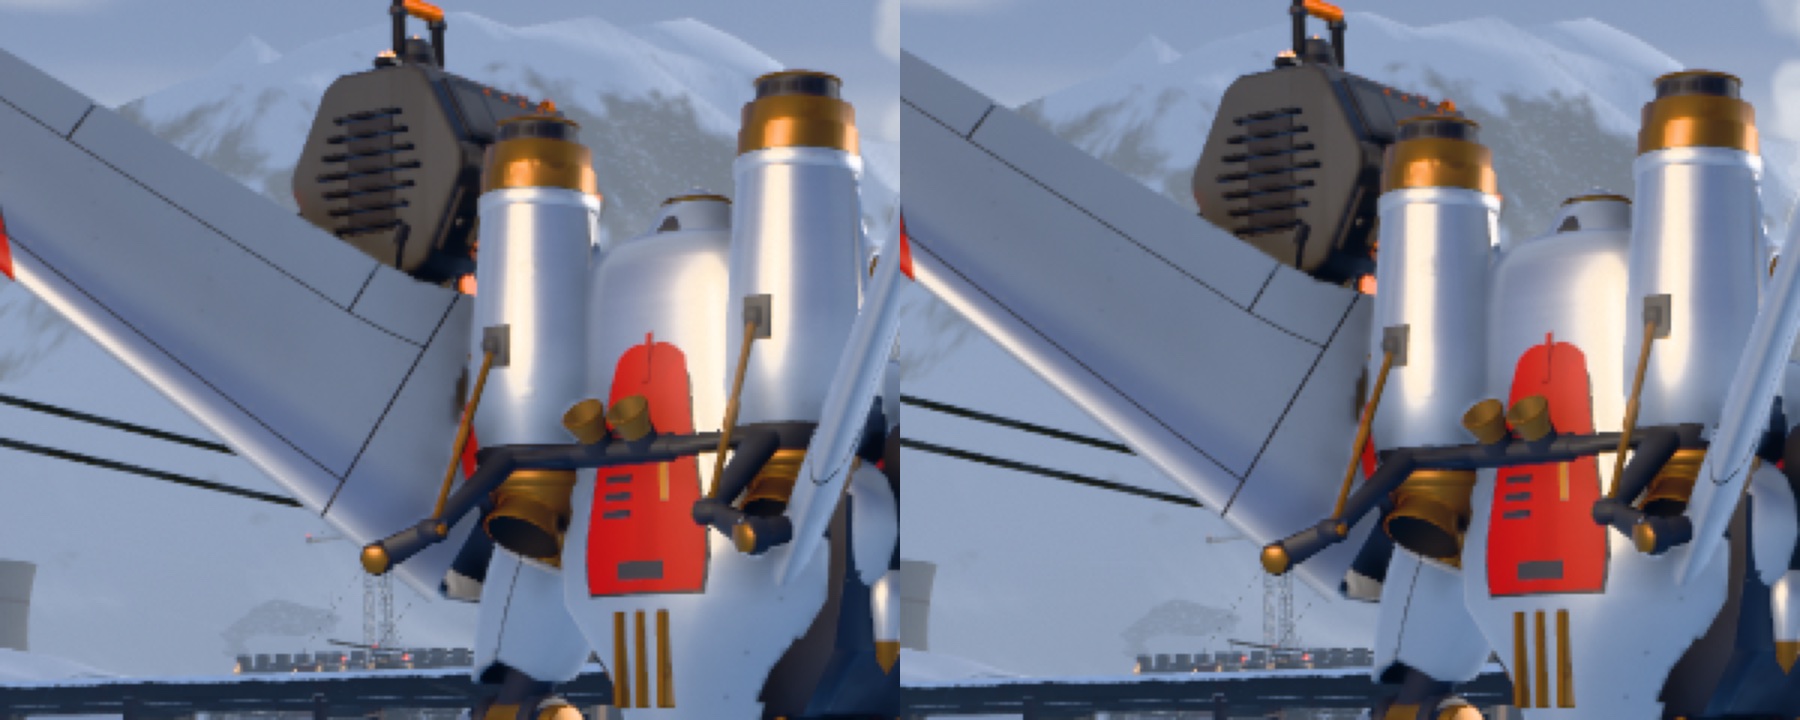
Where the 72,157 triangles go
| Material slot | Triangles | Notes |
|---|---|---|
| Silver paint | 34,828 | Outer armour. Car-paint highlights; brushing direction follows the main surface |
| Graphite | 20,705 | Frame, joint housings, liners |
| Copper | 14,858 | Joint discs, axle caps, nozzle rims |
| Vermilion | 1,250 | The red chest cover and other red parts |
| Head / eyes | 516 | The eye lights are emissive |
In the game
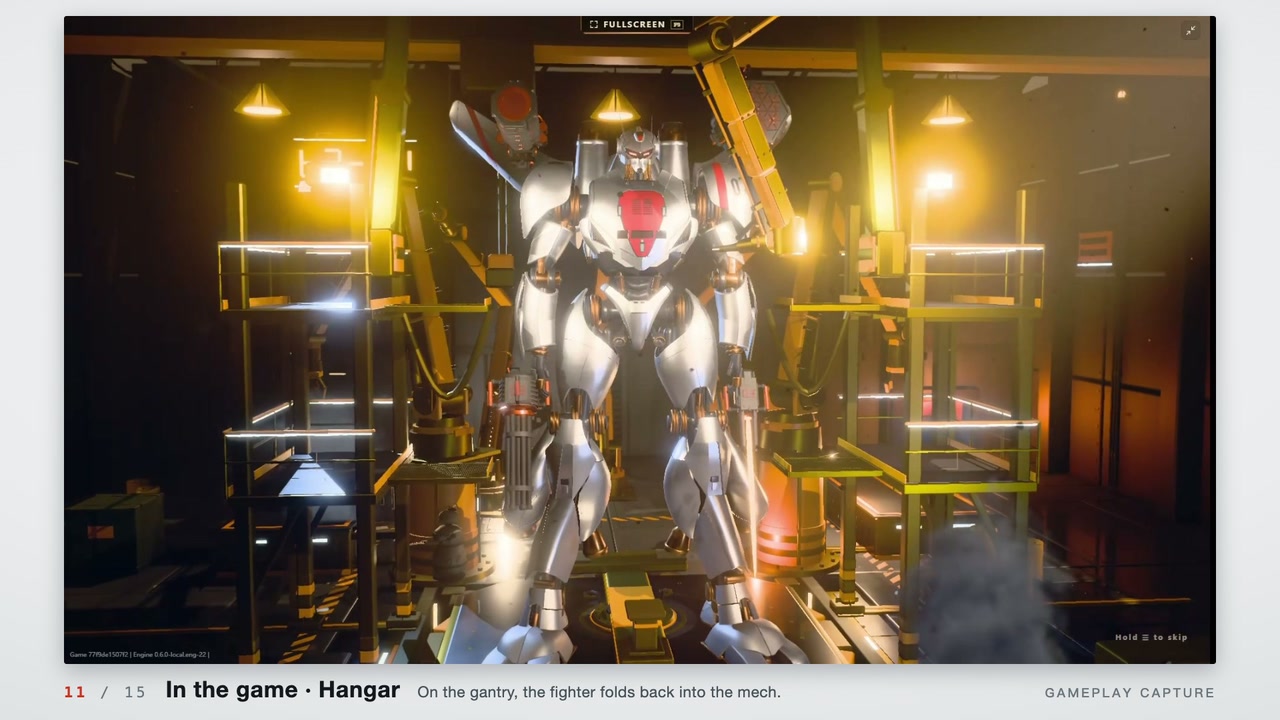
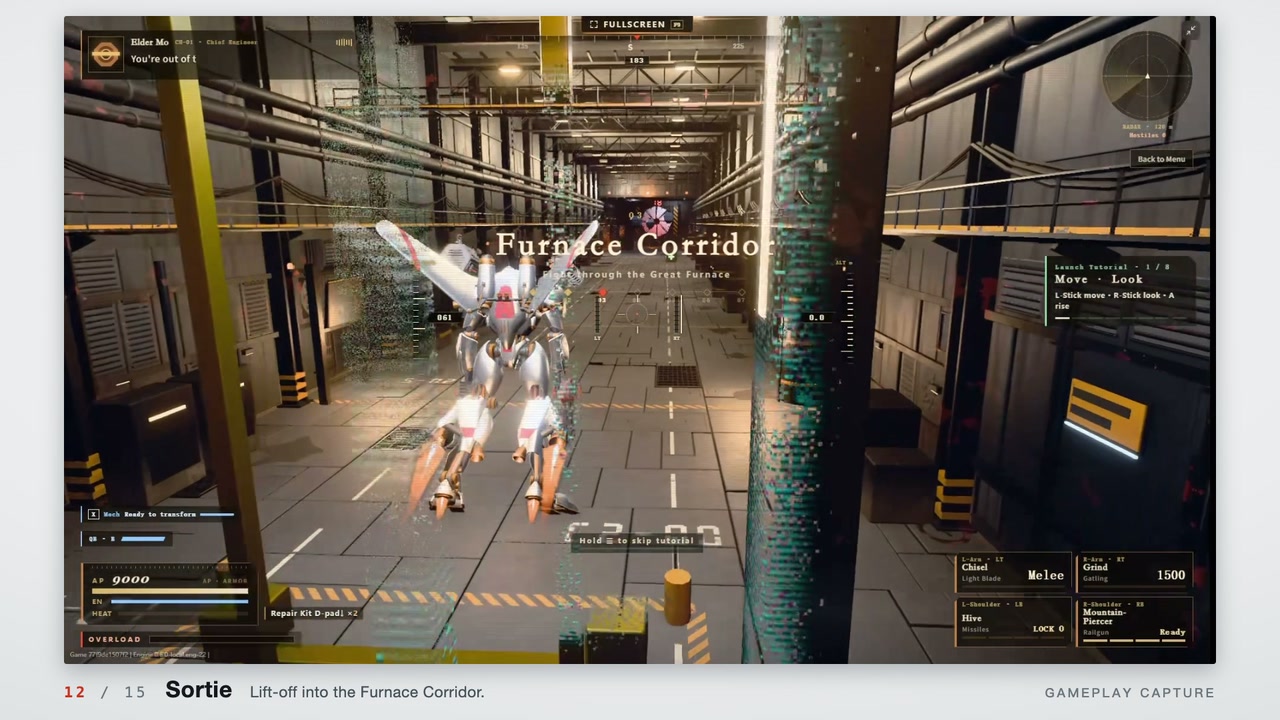
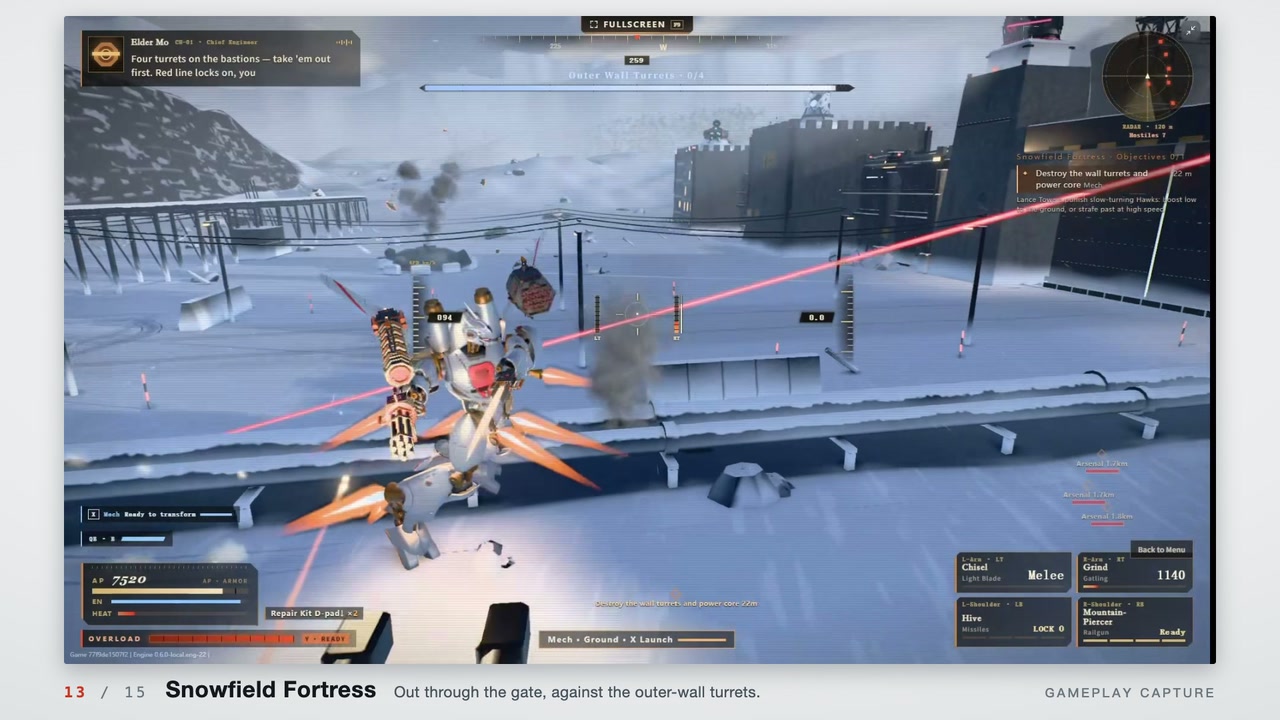
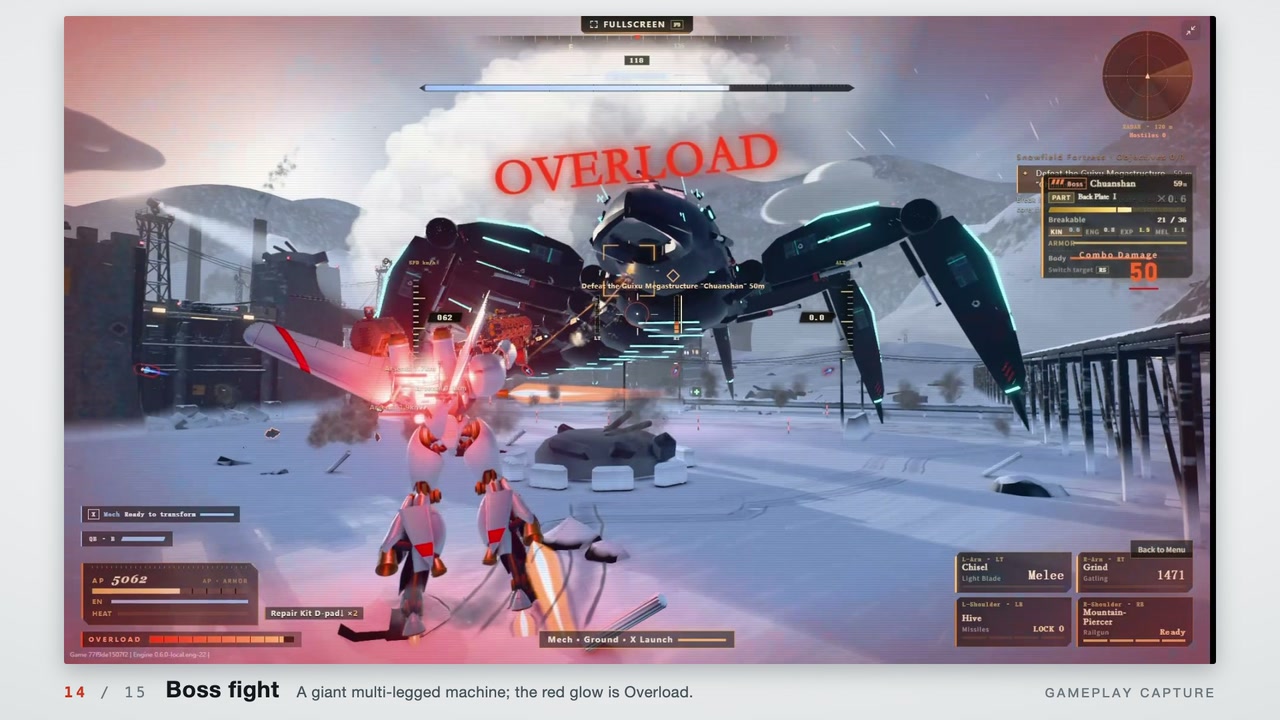
The gameplay at the end of the film is not staged. It is cut at original speed from a real play-through recording: the hangar transform, the sortie, Snowfield Fortress and a boss fight.
You can play Tiangong Warframe in the browser, or open the 3D model and take the mech apart yourself.